Connect your domain
You already own wildlyspecies.com. Follow these steps to point it at your Wildly project.
Open Settings
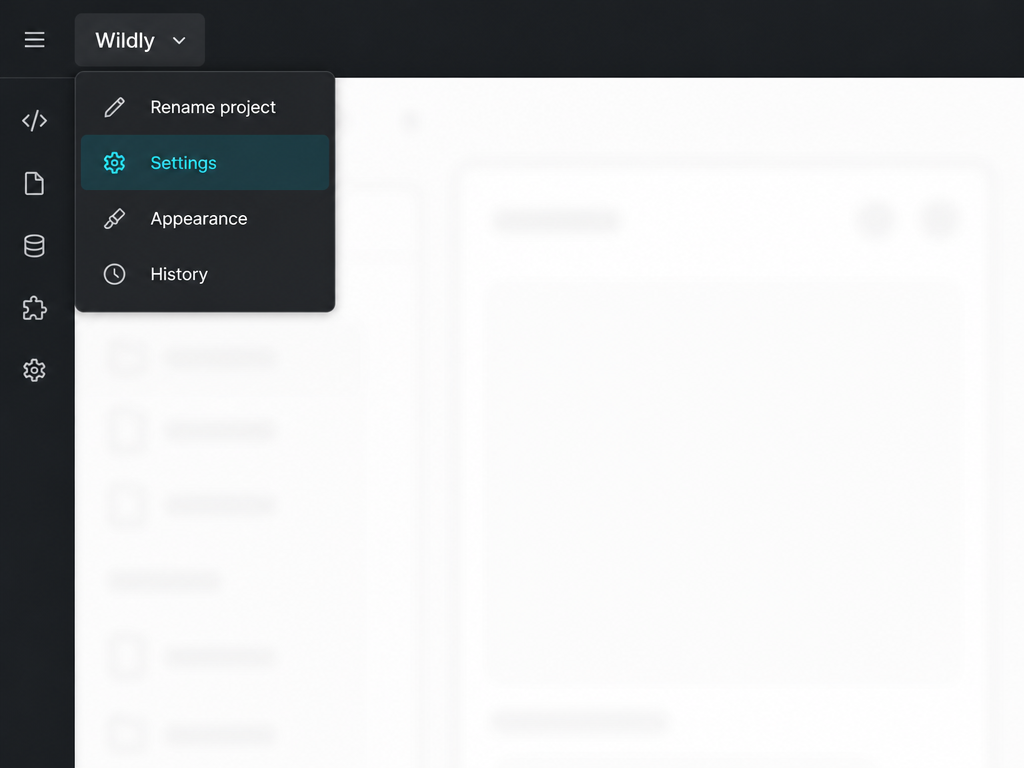
In the Lovable editor, click your project name at the top-left (e.g., “Wildly”). From the dropdown, choose Settings.
Go to Domains
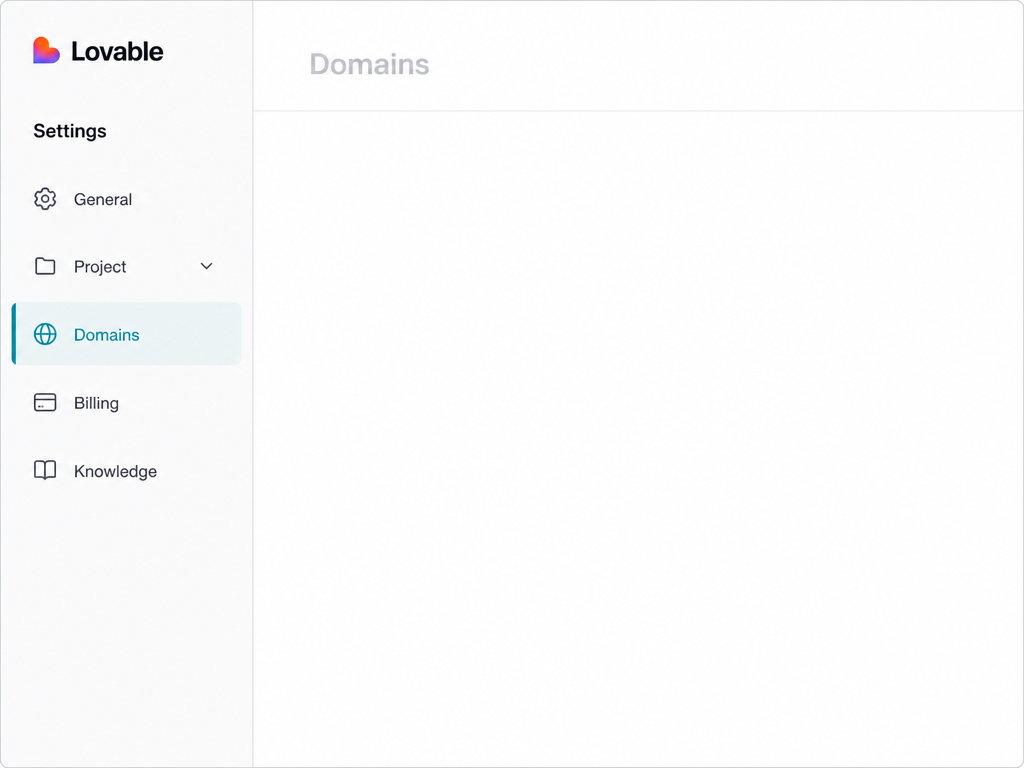
In the Settings sidebar, select Project → Domains. If you are on mobile, use Chat mode → ⋯ → Settings → Project → Domains.
Connect Domain
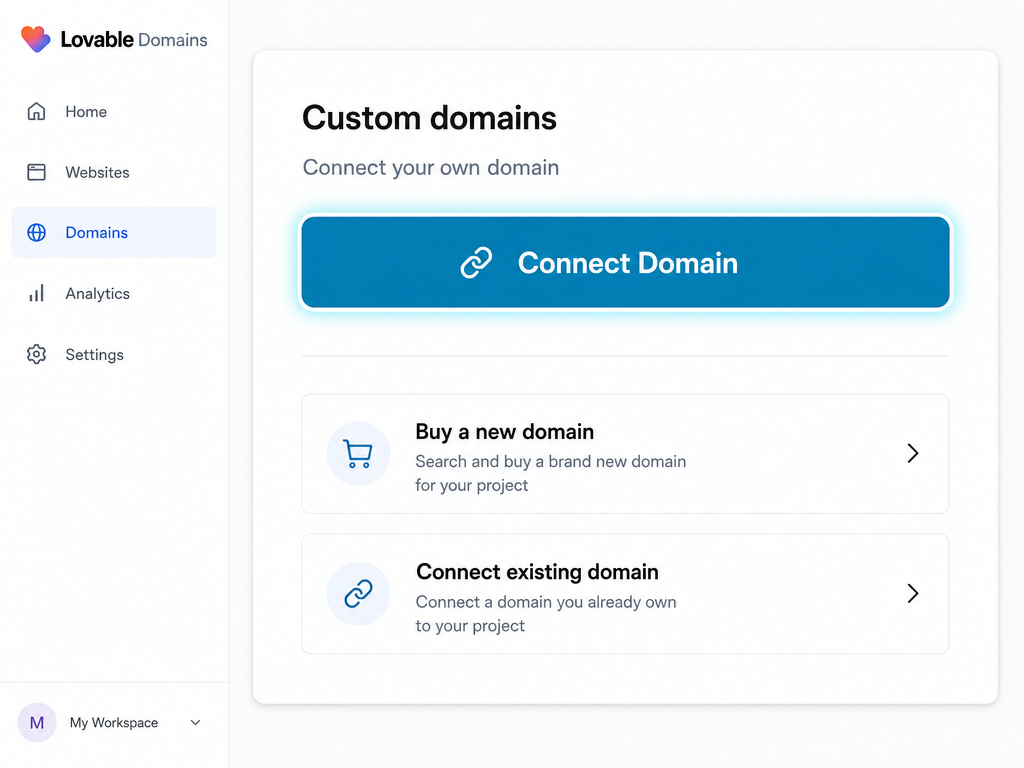
Click the Connect Domain button. Enter wildlyspecies.com first, then add www.wildlyspecies.com as a separate entry if you want both to work.
Add DNS records at Namecheap
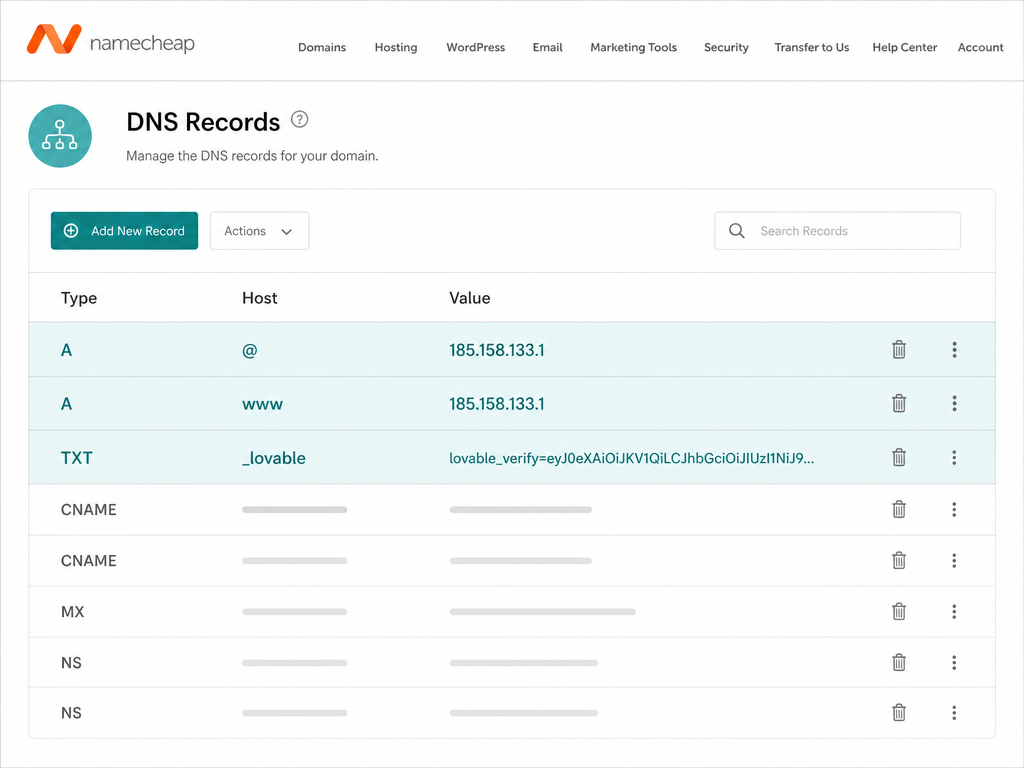
Namecheap will open in a new tab or Lovable will give you the records to add manually. In Namecheap’s Advanced DNS, add the A and TXT records shown below.
Add these records
The exact TXT value comes from Lovable during setup. After adding the records, click Done in Lovable and wait for verification — usually a few minutes, up to 72 hours.